


Mercedes Light Package Systems, comprising advanced electronics like LED headlights and adaptive beams, can suffer from control unit faults, damaged wiring, or software issues. Repair involves securing the vehicle, disconnecting power, removing and replacing the faulty control unit, and reconnecting power. For complex cases, professional auto repair shops specializing in Mercedes restoration offer expert services. Best practices for successful repairs include using genuine parts, maintaining a clean workshop, checking compatibility, and performing regular preventive maintenance to ensure optimal safety and performance. After accidents, professionals can diagnose and resolve lighting issues, restoring your vehicle's lighting system to original standards.
In the realm of automotive electronics, the Mercedes light package system stands out as a complex yet sophisticated tapestry. This article guides you through the intricate process of replacing control units in Mercedes light package repairs, a crucial aspect often overlooked. We’ll delve into common issues plaguing these systems and provide a step-by-step manual for successful installation. Learn how to navigate this labyrinthine process effectively, ensuring optimal performance and longevity for your Mercedes’ lighting components.
- Understanding Mercedes Light Package Systems and Common Issues
- Step-by-Step Guide to Replacing Control Units
- Tips for Successful Installation and Preventive Maintenance
Understanding Mercedes Light Package Systems and Common Issues
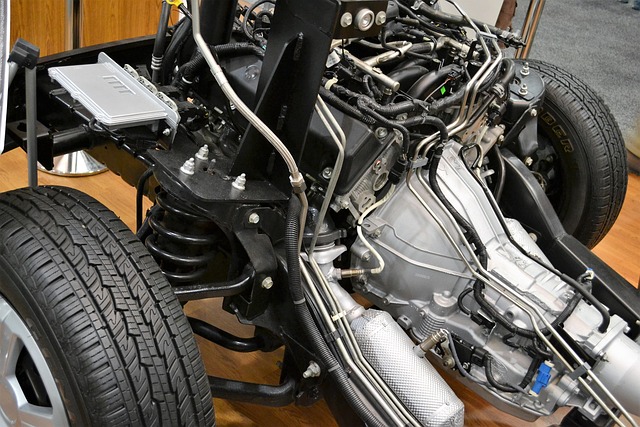
Mercedes Light Package Systems are complex networks of electronics designed to control and manage exterior lighting functions on Mercedes vehicles. These systems integrate advanced features such as LED headlights, adaptive high beams, dynamic turn signals, and smart lighting controls, providing a superior driving experience and enhanced safety. However, like any intricate technology, they can develop issues over time.
Common problems in Mercedes light package repairs include faulty control units, damaged wiring, or compromised software. The control unit acts as the brain of the system, managing various lighting components based on driver inputs and environmental conditions. When this critical component fails, it can result in lights not turning on or off properly, irregular brightness levels, or even complete loss of lighting functionality. Auto repair shops specializing in car restoration for Mercedes vehicles are equipped to diagnose and replace these control units, ensuring the light package system functions optimally.
Step-by-Step Guide to Replacing Control Units

Replacing Control Units in Mercedes Light Package Repairs: A Step-by-Step Guide
When carrying out a Mercedes light package repair, replacing control units is a crucial step to ensure optimal functionality and performance. Here’s a breakdown of the process for those who want to tackle this task themselves or understand the procedure:
1. Safety First: Begin by ensuring your vehicle is securely parked on a level surface with the emergency brake engaged. This safety measure is paramount, especially when dealing with electrical components.
2. Disconnect Power: Next, locate and identify the control unit you need to replace. Once found, disconnect its power supply by turning off the relevant circuit breaker or unplugging the connector.
3. Remove Old Unit: Depending on the model, remove any screws or retaining clips securing the old control unit in place. Carefully lift it out of the housing. This step requires precision to avoid damaging surrounding components, especially in a Mercedes vehicle known for its intricate design.
4. Install New Unit: Insert the new control unit into the designated slot, ensuring it aligns perfectly. Secure it with the appropriate screws or clips.
5. Reconnect Power: After installation, reconnect the power supply by plugging in the connector or flipping on the circuit breaker. Test the system to ensure everything functions as expected after the Mercedes light package repair.
Remember that for complex repairs, consulting a certified technician at a reputable collision center or auto body shop is advisable, especially if you’re not familiar with these processes. They can provide expert car paint services and ensure your vehicle is restored to its best condition, even after an accident (auto dent repair).
Tips for Successful Installation and Preventive Maintenance
When undertaking Mercedes light package repairs, including replacing control units, following best practices ensures optimal results and longevity. Before installation, double-check compatibility with your vehicle model to avoid any issues. Use only genuine or certified replacement parts specifically designed for Mercedes vehicles to guarantee functionality and reliability. The automotive body shop’s environment must be clean and well-lit to facilitate precise work. Ensure proper tools are on hand, as this streamlines the process and reduces the risk of damage.
Regular preventive maintenance is key in keeping your Mercedes light package in top condition. Periodically inspect connections for any signs of corrosion or loose fittings. Clean or replace any worn-out components promptly. Remember that a well-maintained lighting system enhances safety on the road, especially during night driving or adverse weather conditions. In the event of a car collision repair or vehicle body repair, professional technicians can accurately diagnose and resolve issues with Mercedes light packages, ensuring your vehicle is restored to its original performance standards.
Replacing control units in Mercedes light package repairs is a specialized task that requires precision and knowledge. By understanding the intricate systems and common issues, you can effectively navigate the process using our step-by-step guide. Remember, proper installation and regular preventive maintenance are key to ensuring optimal performance and longevity of your Mercedes’ lighting components. With these tips in hand, you’re well-equipped to tackle light package repairs with confidence, keeping your Mercedes shining bright.